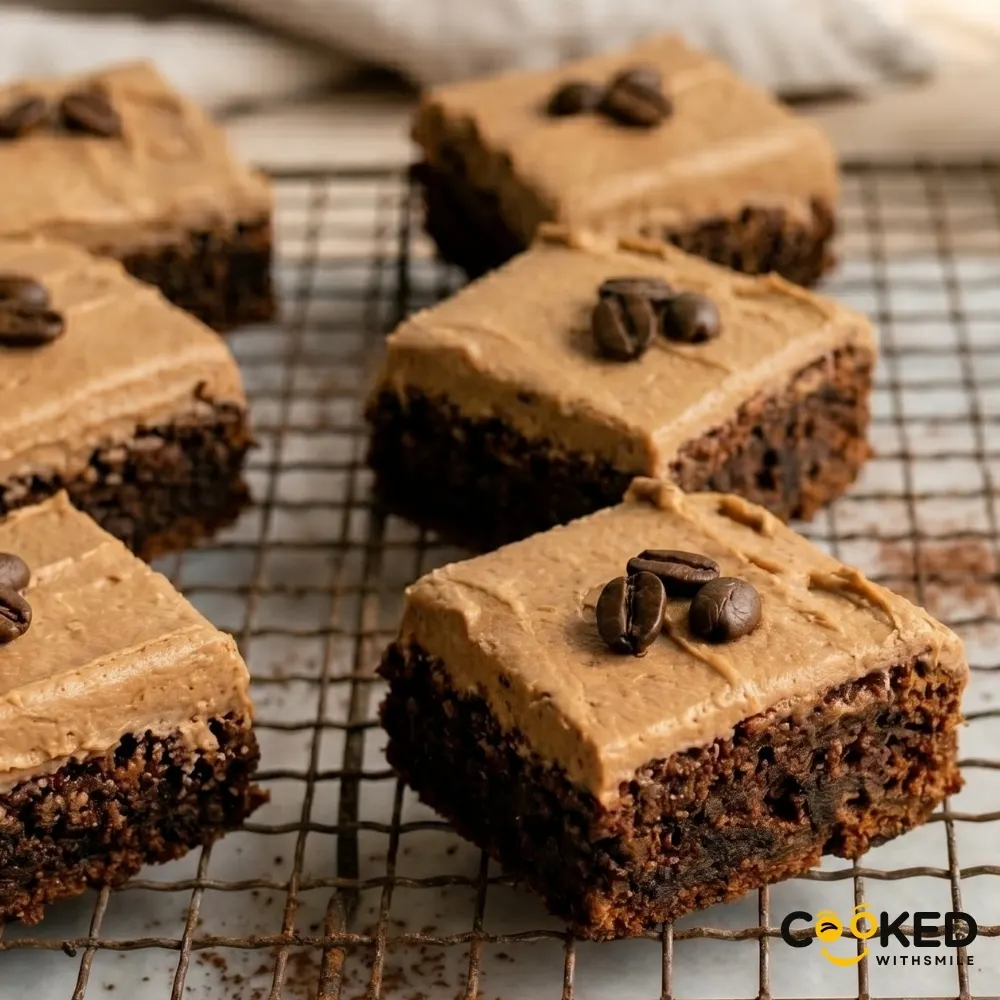
Fudgy Coffee Brownies with Rich Mocha Frosting37 mins
These rich, decadent coffee brownies combine deep, intense espresso flavor with a velvety, smooth mocha buttercream frosting.

Why You Will Love These Fudgy Coffee Brownies
We all have those completely exhausting days where dealing with a complex baking recipe sounds like a literal punishment. This fast, bakery-quality recipe completely solves that weeknight sweet craving by mixing rich cocoa directly with instant coffee granules in a single bowl.
Honestly, you never have to worry about dry, cakey bars again. The chocolate batter gently bakes inside your hot oven, locking in massive amounts of savory espresso flavor before finishing with a thick layer of homemade mocha buttercream frosting.
Sure, grabbing a commercial snack box is tempting, but this home-baked treat is actually faster and vastly more delicious. It is completely foolproof, ridiculously rich with chocolate depth, and guaranteed to become a massive hit with your hungry family tonight.
The Magic of Coffee in Chocolate Baking
People often ask why we do not just stick to regular sugar and vanilla to save a few minutes of grocery shopping time. When you omit coffee from chocolate desserts, you completely miss out on building that incredibly valuable, deep, rich contrast on the inside of the crumb.
Dissolving instant espresso powder directly into warm melted butter traps those natural, rich cacao flavors inside. That is exactly the chemical reaction that builds a perfectly textured piece of dessert that holds up beautifully to a heavy, silky liquid frosting.
If you love trying out comforting variations of rich baked goods, you should check out our traditional brownies recipe homemade or whip up a batch of our best ever chocolate chip cookies recipe.
Expert Tip: The Secret to the Best Fudgy Texture
The absolute biggest mistake people make with brownies is leaving them in the searing hot oven for way too long. It traps the heat and instantly turns from a beautiful, tender dessert into a dry, crumbly mess.
Picking the Right Cocoa Powder
You absolutely want to avoid using super thin, cheap cocoa blends from the discount section if you can possibly help it. They bake far too dry and severely lack that deep, rich, fatty flavor you desperately want for your finished dessert.
Always grab thick, premium Dutch-process dark cocoa powder from the baking aisle of your local grocery store instead. Its incredibly dense, rich texture holds up beautifully against the strongly brewed frosting layers without ever turning into a bitter disaster.
A Closer Look at the Ingredients You Need
The grocery list for these fast one-pot coffee brownies relies heavily on bold, sharp baking pantry staples. You probably have most of these simple items sitting right in your kitchen cabinets already.
- Butter: Use 1/2 cup/approx. 115g of unsalted butter. Melt it completely so it mixes fast and keeps the brownies exploding with savory moisture on the inside.
- Sugars: Grab 1 cup/approx. 200g of white sugar and 1/4 cup/approx. 50g of light brown sugar. Mix them thoroughly so they release their sweet, concentrated flavor into the rich pan base.
- Eggs: Use 2 large, fresh room-temperature eggs. Whisk them very finely so they melt completely into the hot sugar without leaving harsh, raw chunks in your batter.
- Coffee Powder: You need 1.5 tablespoons/approx. 9g of instant espresso powder. Do not use regular liquid coffee, because those lower-concentration options will quickly make your batter far too wet.
- Flour: Measure out 1/2 cup/approx. 64g of all-purpose flour. It releases a soft, structural network and naturally thickens your glossy brownie base.
- Cocoa Powder: Keep 1/2 cup/approx. 42g of unsalted Dutch cocoa powder right by the mixing bowl. The rich powder prevents the dessert from tasting overly sweet while you bake over steady heat.
- Frosting Sugar: Pick up 2 cups/approx. 240g of sweet powdered confectioners’ sugar. The white sugar dissolves down in literally thirty seconds and adds a gorgeous, smooth texture to the heavy frosting.
- Frosting Fat: Measure 1/2 cup/approx. 115g of softened unsalted butter. The rich, velvety fat absolutely wakes up the sweet cream frosting beautifully.
How to Make Coffee Brownies
- Step 1Melt and Mix the Base
Start by pouring your melted butter directly into a large mixing bowl while it is still warm but not scorching hot. Stir in your granulated sugar, brown sugar, and instant coffee granules fiercely using a sturdy whisk or a wooden spoon. Let the mixture sit for roughly two minutes so the coffee crystals dissolve completely into the fat, releasing a sharp, roasted aroma.
- Step 2Incorporate the Wet Ingredients
Drop your room-temperature eggs and a splash of vanilla extract directly into the dark, sweet coffee paste. Whisk the liquids aggressively for a full minute until the mixture lightens slightly in color and looks completely smooth. This intense mixing releases the egg proteins, which is exactly how you achieve that coveted, shiny crinkle top later.
- Step 3Fold the Dry Ingredients
Sift your all-purpose flour, Dutch-process cocoa powder, and a pinch of fine sea salt right over your wet bowl. Switch to a rubber spatula and fold the mixture very gently just until the white flour streaks vanish entirely. You absolutely must avoid overmixing at this point, or you will develop excess gluten and make the bars tough.
- Step 4Bake to Fudgy Perfection
Spread your thick batter evenly into an 8-inch/approx. 20cm square baking pan lined with a sheet of parchment paper. Slide the pan onto the center rack of your preheated oven at 350°F/approx. 180°C for exactly twenty-two minutes. Remove the brownies immediately while the center remains slightly soft, then let them cool completely on a wire rack.
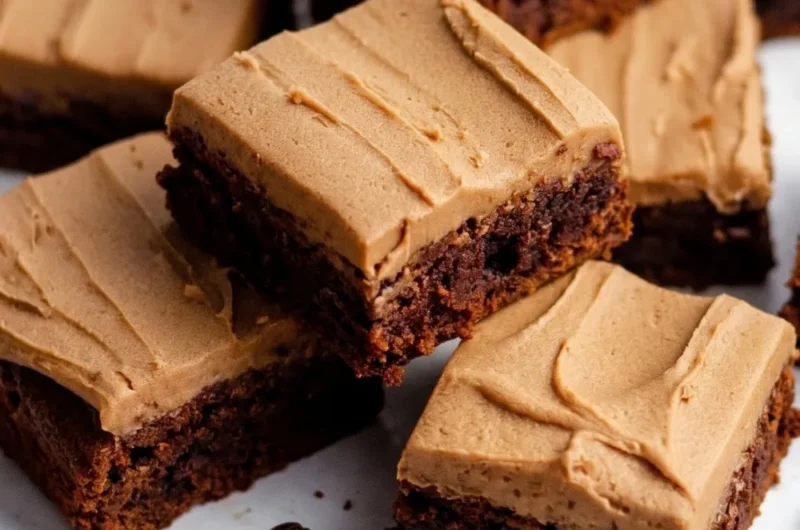
- Step 5Frost and Serve
Whip your softened butter, powdered sugar, extra cocoa, and a tablespoon of strongly brewed espresso together until fluffy. Spread this rich mocha buttercream smoothly across the cooled chocolate slab using an offset spatula or a butter knife. Slice into clean squares and serve them up immediately while the frosting is fresh and perfectly spreadable.
Simple Variations and Substitutions
This fast dessert is totally forgiving, so you can easily swap things around based on what is hiding in your fridge.
You can even throw in heavy handfuls of white chocolate chunks or crushed pretzel pieces during the last five minutes of gentle mixing. The bright, salty bites soften perfectly in the rich batter without ever getting horribly mushy or gray.
If you want to bake a fruity alternative alongside these squares, try our colorful fresh lemon raspberry cookies recipe or our sweet chewydate cookies recipe.
What to Serve With This Easy Sweet Treat
Because this heavy brownie is absolutely loaded with rich fats, clean sugars, and intense espresso flavor, it stands proudly as a massive dessert. You genuinely do not need to spend any extra time preparing complex side sauces tonight.
However, serving it alongside a huge, cold scoop of vanilla bean ice cream or whipped cream is always an incredibly smart idea. You will definitely want something cold and highly porous to soak up every last drop of that rich mocha frosting.
If you want to keep things a bit lighter, a hot mug of unsweetened black coffee tossed with a simple splash of milk is perfect. The bright, bitter bite cuts right through the heavy, rich fat of the thick chocolate beautifully.
If you enjoy preparing other effortless family favorites, try our citrusy soft lemon cookies recipe or pull together our best ever easy banana muffins recipe.
How to Store and Reheat Leftovers
This simple dessert actually tastes fantastic the very next day, but you must handle the frosted layers carefully.
Let your hot baking pan cool completely on the cold wire rack before transferring the leftovers into a heavy glass airtight container. Store the tightly sealed box in your refrigerator safely for up to four or five days.
Reheating frosted brownies requires a very gentle touch. You absolutely must avoid using high heat so the buttercream layer does not melt away into the pan, keeping it instead at room temperature until it is just barely warmed through.
Frequently Asked Questions
No, because adding liquid coffee introduces far too much moisture and will make your batter completely wet and runny. Stick to dry instant granules to get that deep flavor without altering the delicate liquid-to-dry balance.
I highly recommend leaving the baked slab inside the pan while it cools. It acts as a protective structural barrier to keep the edges ridiculously juicy and soft. You can easily lift it out with parchment paper right before you slice if you prefer.
This almost always happens if your melted butter base was far too hot when you poured the dairy ingredients into the bowl. You must drop the temperature to a cool room setting before adding cream components to prevent the fats from breaking aggressively.
Yes, you can easily use a full-fat vegan butter stick or a high-quality, unflavored coconut oil instead of cow’s dairy butter. Just make sure you use extra cocoa powder instead of milk chocolate for your initial melting step.
The absolute best way to check your bars is to press gently on the center part of the baking pan with a toothpick. It should come out with a few moist crumbs clinging to the wood and look beautifully opaque and dark all the way through.
Fudgy Coffee Brownies with Rich Mocha Frosting
Course: DessertsCuisine: American16
Bars15
minutes22
minutes37
minutesThese deeply decadent chocolate bars are infused with bold espresso powder and topped with a luxurious layer of fluffy mocha buttercream frosting.
Ingredients
- For the Brownie Base
1/2 cup or 100g Granulated sugar
1 large Lemon zested
1/2 cup or 113.5g Unsalted butter softened to room temperature
1/4 cup or 55g Brown sugar
1 large Egg yolk
1 tablespoon Lemon juice about half a lemon
1 teaspoon Vanilla extract
1/2 teaspoon Salt
1/2 teaspoon Baking powder
1/4 teaspoon Baking soda
1 and 1/4 cups or 175g All purpose flour
3/4 cup or 75g Frozen raspberries chopped small
Flaked sea salt for sprinkling on top
- For the Mocha Frosting
1/2 cup (approx. 115g) unsalted butter, softened to room temperature
2 cups (approx. 240g) powdered confectioners’ sugar
2 tablespoons (approx. 16g) Dutch-process cocoa powder
1 tablespoon (approx. 15ml) strongly brewed liquid espresso, cooled
1 tablespoon (approx. 15ml) heavy cream
Directions
- Preheat your kitchen oven to 350°F (180°C) and line an 8-inch (20cm) square baking pan with parchment paper, leaving an overhang for easy removal.
- In a large mixing bowl, whisk the warm melted butter, white granulated sugar, and packed light brown sugar together until completely combined.
- Add the instant coffee granules and vanilla extract, whisking vigorously until the coffee crystals fully dissolve into the warm fat.
- Crack in the room-temperature eggs one at a time, beating the mixture aggressively for one full minute until the batter turns thick and shiny.
- Sift the all-purpose flour, Dutch cocoa powder, and fine sea salt directly into the wet base, then fold gently with a rubber spatula just until the dry spots vanish.
- Pour the thick chocolate batter into your prepared baking pan, spreading it evenly into the corners.
- Bake for exactly 22 minutes until the edges are set but the center remains slightly soft to the touch.
- Remove from the oven and let the pan cool completely on a metal wire rack before attempting to frost.
- To make the frosting, beat the softened butter in a stand mixer for 2 minutes until light and creamy.
- Gradually add the powdered sugar, cocoa powder, cooled brewed espresso, and heavy cream, whipping on high speed until fluffy.
- Spread the mocha frosting evenly across the cooled brownie slab, slice into 16 squares, and serve.
Notes
- Coffee Intensity: If you prefer a milder taste, drop the instant coffee granules down to 1 tablespoon in the brownie base.
- Storage: Store leftovers in a single layer inside an airtight container in the refrigerator for up to 5 days.